准备工作
项目采用idea开发,所以不需要插件,使用
spring-boot+javaFx,实现MVC结构,整体项目结构类似于spirngboot项目
1、安装JavaFx Secen Builder,这个工具可视化布局,好用,官网:(https://www.oracle.com/java/technologies/javafxscenebuilder-1x-archive-downloads.html
2、找一个项目的icon格式图标、png格式的图标
3、下载exe4j,官网:https://exe4j.apponic.com/,后面打包要用
项目构建
1、依赖
idea生成新的JavaFx项目,然后右键项目,选择maven项目,pom.xml中添加依赖
<dependencies>
    <dependency>
        <groupId>org.springframework.boot</groupId>
        <artifactId>spring-boot-starter</artifactId>
        <version>2.1.0.RELEASE</version>
    </dependency>
    <dependency>
        <groupId>de.roskenet</groupId>
        <artifactId>springboot-javafx-support</artifactId>
        <version>2.1.6</version>
    </dependency>
    <dependency>
        <groupId>org.projectlombok</groupId>
        <artifactId>lombok</artifactId>
        <version>1.18.12</version>
    </dependency>
</dependencies>
<build>
    <plugins>
        <plugin>
            <groupId>org.springframework.boot</groupId>
            <artifactId>spring-boot-maven-plugin</artifactId>
            <version>2.0.1.RELEASE</version>
            <executions>
                <execution>
                    <goals>
                        <goal>repackage</goal>
                    </goals>
                </execution>
            </executions>
        </plugin>
        <plugin>
            <groupId>org.apache.maven.plugins</groupId>
            <artifactId>maven-compiler-plugin</artifactId>
            <configuration>
                <source>8</source>
                <target>8</target>
            </configuration>
        </plugin>
    </plugins>
</build>
2、主界面fxml
fx:controller中为视图控制类全类名
<?xml version="1.0" encoding="UTF-8"?>

<?import java.lang.*?>
<?import javafx.geometry.*?>
<?import javafx.scene.control.*?>
<?import javafx.scene.layout.*?>

<AnchorPane prefHeight="900.0" prefWidth="1200.0" xmlns="http://javafx.com/javafx/8" xmlns:fx="http://javafx.com/fxml/1" fx:controller="org.yhgh.memory.controller.MainController">
</AnchorPane>
3、视图控制类
视图控制类,需要使用@FXMLView注解,并且继承AbstractFxmlView
//这里的为该视图fxml的路径
@FXMLView("/main.fxml")
public class MainController extends AbstractFxmlView {

}
4、自定义开场动画
最简单的方法,更换图片,然后完事
public class SplashView extends SplashScreen {
    //开始界面图片,可以自定义
    //@Override
    //public String getImagePath() {
    //    return "/image/logo.png";
    //}
    //是否显示开始界面
    @Override
    public boolean visible() {
        return super.visible();
    }
    //这个方法可以自定义界面
    @Override
    public Parent getParent() {
        return super.getParent();
    }
}
4、使用托盘
使用系统托盘,点击关闭按钮就不会关闭程序了
@Component
public class SysTray {

    public static SystemTray getSysTray(Stage primaryStage) throws Exception {
        //点击关闭按钮,不退出fx程序
        Platform.setImplicitExit(false);
        //构建系统托盘图标
        BufferedImage image = ImageIO.read(Objects.requireNonNull(Main.class.getClassLoader().getResourceAsStream("image/logo.png")));
        TrayIcon trayIcon = new TrayIcon(image, "Memory");
        trayIcon.setImageAutoSize(true);
        //设置弹出菜单
        PopupMenu popup = new PopupMenu();
        //菜单项(打开App)
        MenuItem showItem = new MenuItem("OpenApp");
        //菜单项(退出)
        MenuItem exitItem = new MenuItem("Close");
        popup.add(showItem);
        popup.add(exitItem);
        trayIcon.setPopupMenu(popup);
        //获取系统托盘
        SystemTray tray = SystemTray.getSystemTray();
        //添加托盘鼠标点击事件
        trayIcon.addMouseListener(new MouseAdapter() {
            @Override
            public void mouseClicked(MouseEvent e) {
                //双击左键,判断是否打开应用
                if (e.getButton() == MouseEvent.BUTTON1 && e.getClickCount() == 2) {
                    Platform.runLater(() -> {
                        if (primaryStage.isIconified()) {
                            primaryStage.setIconified(false);
                        }
                        if (!primaryStage.isShowing()) {
                            primaryStage.show();
                        }
                        primaryStage.toFront();
                    });
                }
            }
        });
        //添加托盘菜单事件
        showItem.addActionListener(new ActionListener() {
            @Override
            public void actionPerformed(ActionEvent e) {
                Platform.runLater(() -> {
                    if (primaryStage.isIconified()) {
                        primaryStage.setIconified(false);
                    }
                    if (!primaryStage.isShowing()) {
                        primaryStage.show();
                    }
                    primaryStage.toFront();
                });
            }
        });
        exitItem.addActionListener(new ActionListener() {
            @Override
            public void actionPerformed(ActionEvent e) {
                Platform.setImplicitExit(true);
                tray.remove(trayIcon);
                Platform.runLater(primaryStage::close);
            }
        });
        //添加托盘图标
        tray.add(trayIcon);
        return tray;
    }
}
5、启动类
启动类需要使用@SpringBootApplication注解,然后继承AbstractJavaFxApplicationSupport
@SpringBootApplication
public class Main extends AbstractJavaFxApplicationSupport {
	// 这个方法是项目启动后的钩子函数,可以在里面写逻辑,例如系统托盘
    @Override
    public void start(Stage stage) throws Exception {
        super.start(stage);
        //开启托盘
        SysTray.getSysTray(stage);
    }

    public static void main(String[] args) {
        // 参数分别是Application的主类,主界面的UI类,闪屏对象,args
        // 不想要自定义闪屏的可以调用另一个不带闪屏对象的launch方法
        launch(Main.class, MainController.class,new SplashView(), args);
    }
}
6、配置文件
javafx:
  title: demo
  appicons: /logo.png
7、运行
直接运行主程序就可以了
8、打包
这里我使用的是exe4j打包
准备环境
a、先运行maven package,将项目打包为jar
b、测试jar包是否运行正常
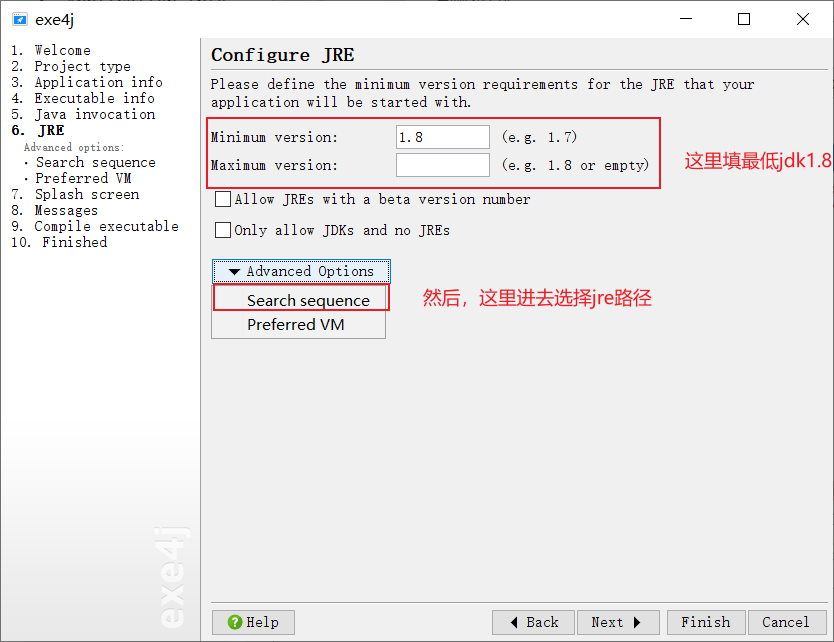
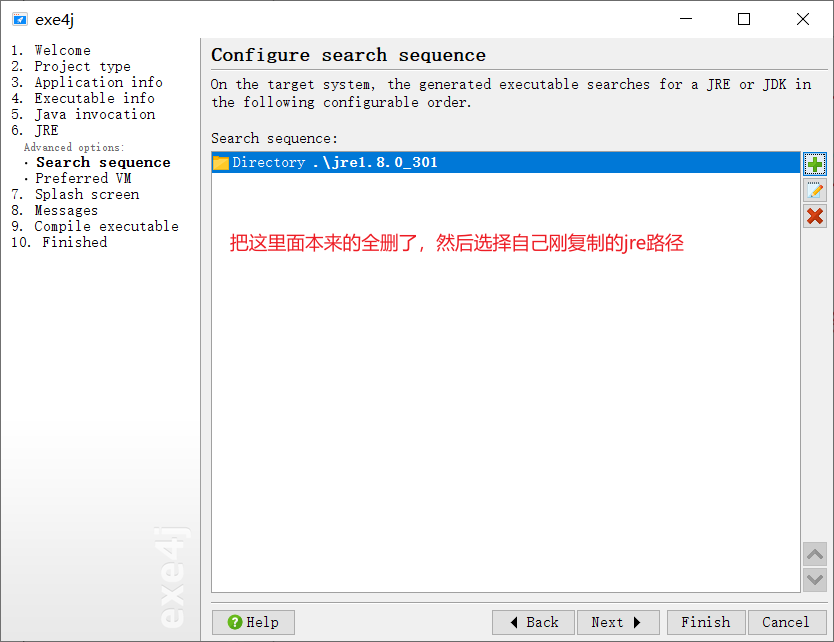
c、在非中文路径中,创建一个文件夹,然后在这个文件夹中,创建lib文件夹,将打好的jar放里面;创建icon文件夹,将项目的图标放里面;将自己的jre复制一个到文件夹中
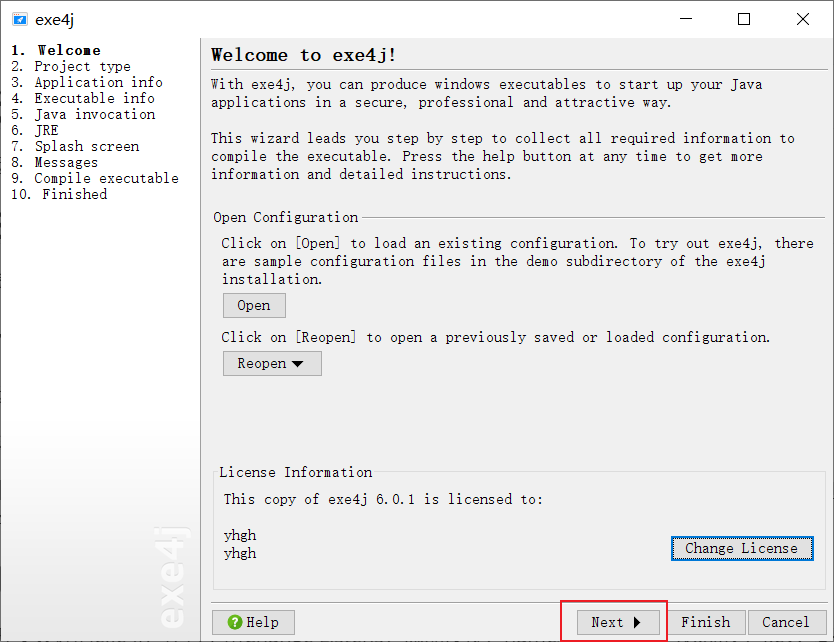
使用exe4j打包
a、打开安装好的exe4j,在右下角Change Listens,添加授权,name和company可以随便,key:L-g782dn2d-1f1yqxx1rv1sqd
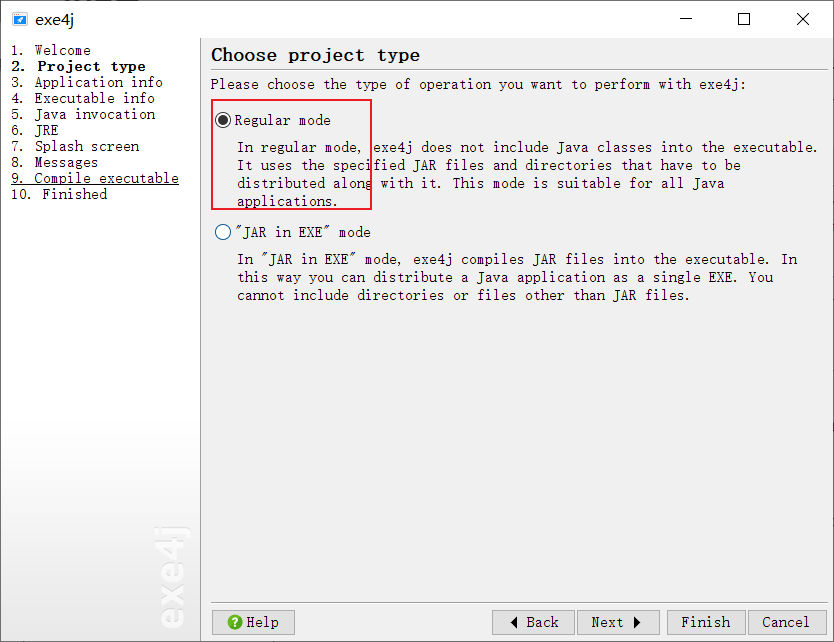
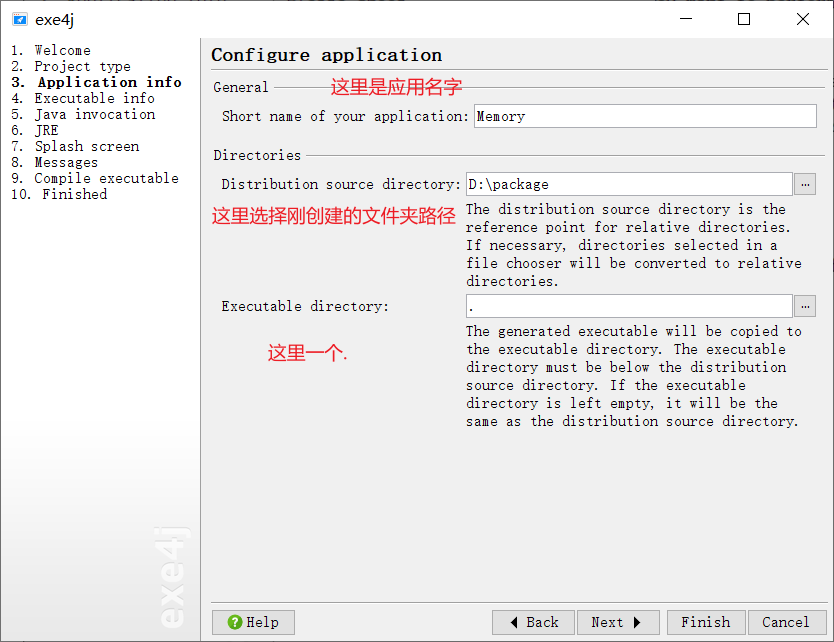
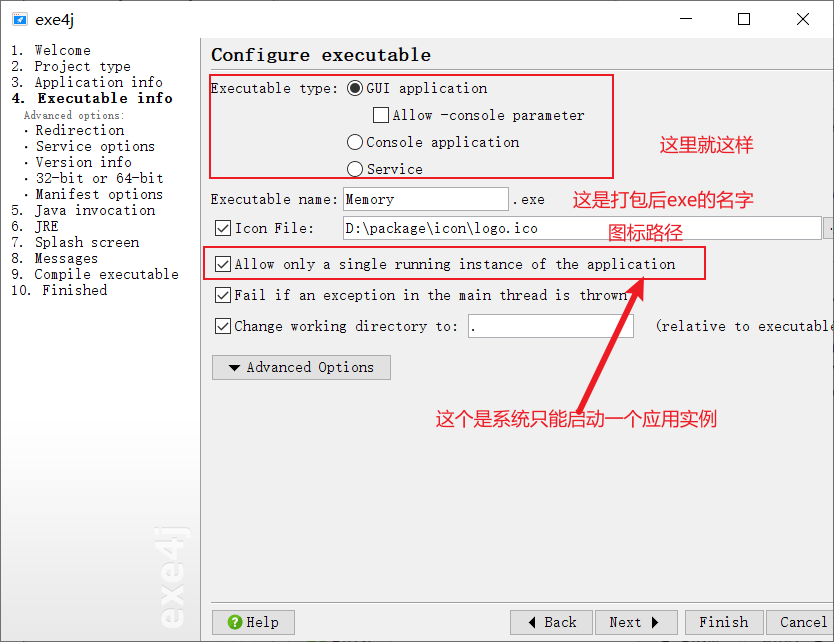

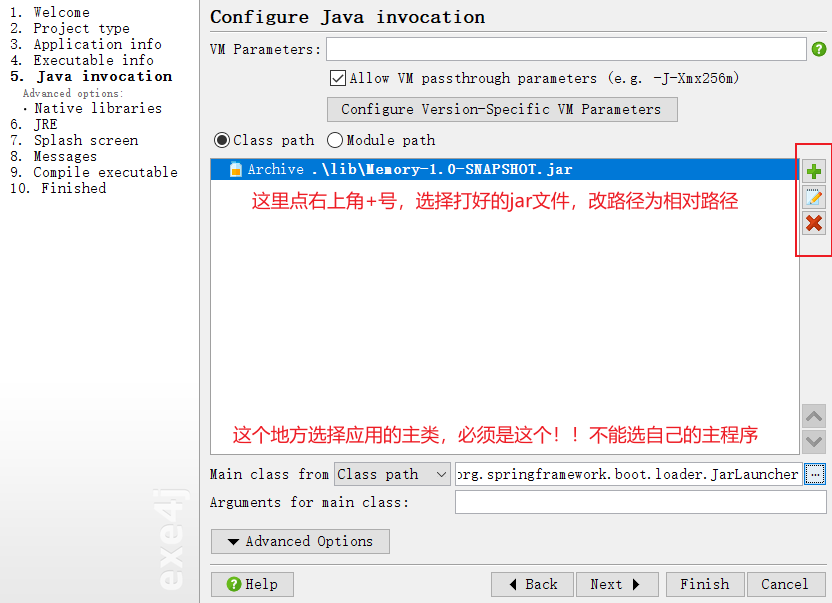
b、然后剩下的一路下一步,打包完,就可以打开目录里面的exe了